Underground
Underground Oil Tank Removal process
What is involved with removing an underground oil tank?
Step 1 - Local Permits
Local permits are required in most towns for the removal of residential or commercial heating oil tanks.
Fire Marshalls Office and/or Building Departments are contacted and a tentative date/time is chosen for inspection.

Step 2 - Underground Utilities are marked (CBYD-811)
An outline of the Tank is made to facilitate utility mark-out and to assist with planning and equipment required.
We obtain a utility markout (as required by law), so underground utilities are located by their respective owners (which includes but is not limited to): Gas, Water, Sewer, Phone, Cable, Electric, etc. We ask the owner to assist us to identify any additional electrical lines for lights, water drainage, sprinkler system, electronic pet fencing, etc that he or she is aware of.
Step 3 - Oil Tank Removal Procedures
We uncover the buried heating oil tank by excavating all soil necessary to expose the top of the buried oil tank. Most underground storage tanks are buried 2' to 4' deep (measured from the top of the tank to ground level)
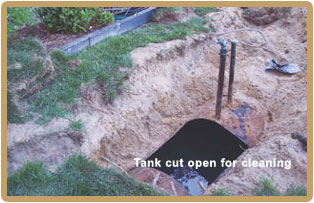
After the tank has been exposed (i.e., the top of the tank is visible), the oil  tank will be checked for combustable vapors. If necessary, an inert or flame retardent type gas will be dispensed to displace combustable vapors and then the tank will be cut open. In some cases to properly clean a tank, the entry way cut in to the tank must be large enough to allow a technician to enter the tank to perform the physical cleaning process. Tank cleaning then consists of pumping and removing all liquids and sludges from the tank. The tank will then be washed inside and all liquids and sludges generated as a result of the tank cleaning process will be transported from the site to an approved waste oil recycling facility.
After the Oil Tank has been cleaned and inspected, the Tank will be lifted in its entirety from the ground for inspection. At this time the local fire official performs an inspection of the Oil Tank and tank grave. If no holes and leakage are noted in the Tank and no evidence of a petroleum release is observed in the tank grave, soil samples are then taken and the excavation will be backfilled with proper material & compacted.
Step 4 Oil Tank Certification
After all the site work is completed and soil test results received, a Closure Report is generated detailing the tank removal process. The report will document the Oil Tank removal and provide a Tank Removal Certification.
The report will also include the following information:
Copy of the local permit for Tank removal (when required).
Step by step Photo documentation of the Tank removal process.
Comments (if any) by the Fire Marshall.
A witnessed observation of the condition of the Tank and if any contamination was observed during the excavation.
A written description of the Tank removal activities.
Verifiable Tank Disposal documentation and
Laboratory results of soil sample(s) from a State Approved Lab